In order to have proper mouse and screen integration as well as folder sharing with your host system, you will need to install the VirtualBox Guest additions.
First you need to install this guest addition in windows or whatever your host system is then you need to mount iso into the guest OS.
Once you have booted into your Kali Linux virtual machine, open a terminal window and issue the following command to install the Linux Kernel headers.
apt-get update && apt-get install -y linux-headers-$(uname -r)
uname -r prints the name, version and other details about the current machine and the operating system running on it. and saves it into $ variable.
NOTE: If you are not running as root, ensure you prepend the command with a 'sudo'
Once this is complete you can now attach the Guest Additions CD-Rom. This can be done by selecting 'Devices' from the VirtualBox Menu and selecting 'Install Guest Additions.' (In addition you can use the shortcut Host key+D.) This will mount the virtual CD Drive to your Kali Linux virtual machine. When prompted to autorun the CD, click the Cancel button.

Copy the VboxLinuxAdditions.run file from the Guest Addition CD-Rom to Desktop
chmod +x VboxLinuxAdditions.run
and then run
./VboxLinuxAdditions.run

After running it will take some time to complete then you need to reboot the Kali Linux VM to complete the Guest Additions installation.
You should now have full mouse and screen integration as well as the ability to share folders with the host system.
Adding Shared Folders in VM
In order to share folders on your host system with your Kali Linux VM, there are a few short steps that need to be completed.
From the VirtualBox Manager, select your Kali Linux VM instance and click on the 'Shared Folders' link in the right window pane. This will launch a pop up window for adding shared folders. Within this window click the icon to add a folder (the icon is a Folder with a '+' on it).

In the Folder Path text box, provide the path to the folder you would like to share, or click the drop-down arrow to browse your host system for the path. Select the check boxes that allow for 'Auto-mount' and 'Make Permanent' and click the OK button both times when prompted.
Before that In windows Create a folder to share
right click on it --> share with --> specific people

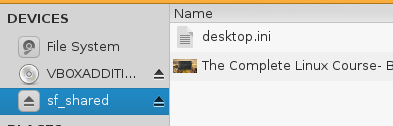
Now you can see the shared folder in kali linux
First you need to install this guest addition in windows or whatever your host system is then you need to mount iso into the guest OS.
Once you have booted into your Kali Linux virtual machine, open a terminal window and issue the following command to install the Linux Kernel headers.
apt-get update && apt-get install -y linux-headers-$(uname -r)
uname -r prints the name, version and other details about the current machine and the operating system running on it. and saves it into $ variable.
NOTE: If you are not running as root, ensure you prepend the command with a 'sudo'
Once this is complete you can now attach the Guest Additions CD-Rom. This can be done by selecting 'Devices' from the VirtualBox Menu and selecting 'Install Guest Additions.' (In addition you can use the shortcut Host key+D.) This will mount the virtual CD Drive to your Kali Linux virtual machine. When prompted to autorun the CD, click the Cancel button.

Copy the VboxLinuxAdditions.run file from the Guest Addition CD-Rom to Desktop
chmod +x VboxLinuxAdditions.run
and then run
./VboxLinuxAdditions.run

After running it will take some time to complete then you need to reboot the Kali Linux VM to complete the Guest Additions installation.
You should now have full mouse and screen integration as well as the ability to share folders with the host system.
Adding Shared Folders in VM
In order to share folders on your host system with your Kali Linux VM, there are a few short steps that need to be completed.
From the VirtualBox Manager, select your Kali Linux VM instance and click on the 'Shared Folders' link in the right window pane. This will launch a pop up window for adding shared folders. Within this window click the icon to add a folder (the icon is a Folder with a '+' on it).

In the Folder Path text box, provide the path to the folder you would like to share, or click the drop-down arrow to browse your host system for the path. Select the check boxes that allow for 'Auto-mount' and 'Make Permanent' and click the OK button both times when prompted.
Before that In windows Create a folder to share
right click on it --> share with --> specific people

Now you can see the shared folder in kali linux


No comments:
Post a Comment